

Are you ready to scale up your Canva designs? Our ongoing series of Canva hacks and tutorials is designed to keep designing on the platform fun while providing you with tools to make your social media posts stand out from your competitors. Today, we’re going to explore how to create a fun, Polaroid-style instant photo animation.
What Is the Instant Photo Animation Effect?
Many years ago, you either shot film and sent it to a darkroom for development, waited for the photos to come back, created your own darkroom at home, or bought trendy and expensive instant film from the Polaroid Company, now rebranded as Polaroid IP B.V.
In a nutshell, the film in old instant photo cameras would be fed out and developed in minutes. The Canva effect provides the same feel, but in a digital format. It’s eye-catching for users and a good way to announce a new product or special offer. The look works for almost any type of business.
Anything you can do to stand out helps your business. The average person sees thousands of ads a day. Digital ad spend alone is over $259 billion per year as of 2024. With so many different messages competing, an animated, retro post can grab the attention of your target audience.
Favorite Design
There are many different ways you can play around with the effect, but a favorite is animating the instant photo so it looks like it’s coming out of a camera. Here is the effect and the steps to get there.
Step 1: Choose a Camera Image
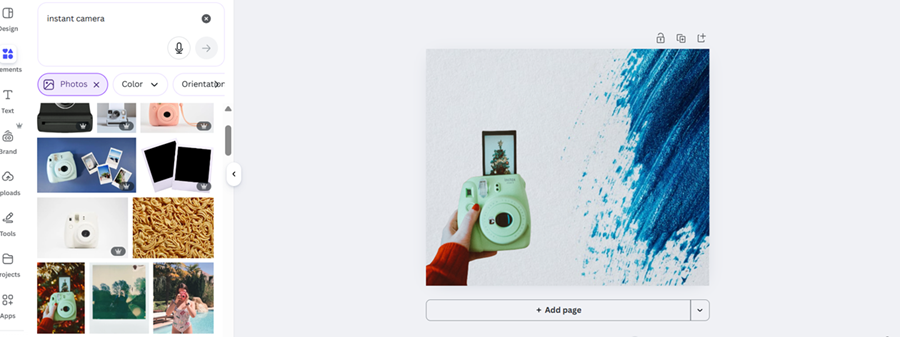
For this article, I chose a Facebook post-sized blank template on Canva and added a background with a splash of blue. The vision was to add animated images and the word ‘sale’ to promote a special offer for a product.
Once the background was in place, it was time to find a cute instant capable camera for the image to come out of. You can choose whatever works best for you. The camera above had a background, but Canva’s background remover feature quickly took care of that.
Step 2: Choose the Instant Photo Image
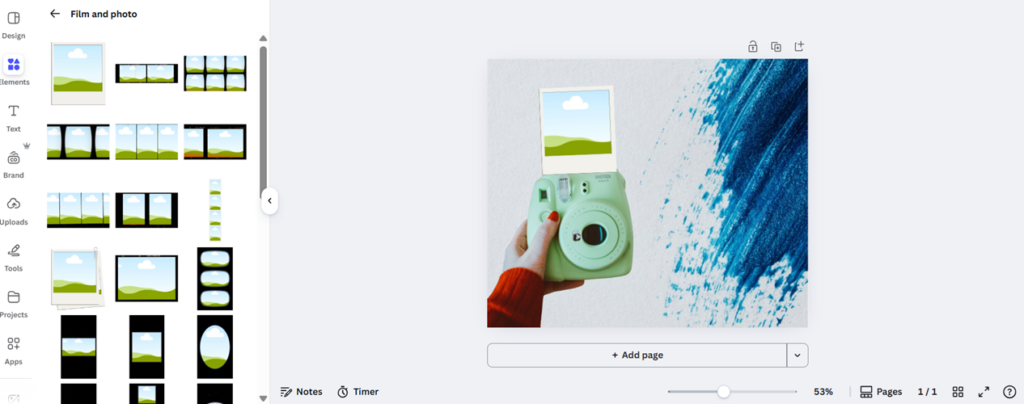
The tool you want is found in frames. Go to Elements and Frames/Film and Photo and select the instant photo frame that works best for you. I chose a traditional square look and adjusted the size from there.
You’ll notice that an image is already being displayed from the camera I chose. It would not entirely hide behind the frame. I selected “Erase”, clicked on that portion and erased it. What was left with a white rectangle. I selected “Remove BG” again and freed up the space. I could then add my frame without anything showing through.
Step 3: Adjust Placement
I had to tilt the frame slightly and make it smaller, so it made sense that the film would come out of the camera pictured. Experiment until you achieve the desired look. It may take some trial and error, as most design does.
Step 4: Add Image
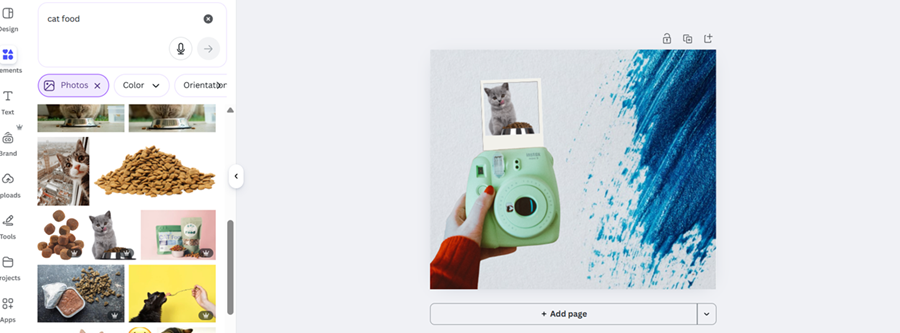
Choose whatever you’re trying to promote. For this tutorial, I selected a cut cat eating a bowl of food that you might see in a pet food advertisement. Ensure the frame is positioned behind your camera. Otherwise, the design will look odd in your next step.
Step 5: Animate
For your final step, make sure you have the frame only selected. Go to Animate. Choose Baseline, the up arrow and slow the speed all the way down. It will look like this:

Gifs are widely accepted on social media and for websites, but you can also download this file as an MP4 video.
For finishing touches, you can add details about the promotion, your logo or words.
Doesn’t It Take Too Long to Create Animations?
You’re a busy entrepreneur. You may worry that you won’t have time to bother with all these hacks. Once you get the hang of it, though, you can apply this one to many different scenarios. It took me about 15 minutes to create a simple one. The one above took slightly longer as I had to hunt for images. If you already have photos you want to use, it will be faster, and you can scale them for future promotions.
Leave a Comment