
Do you need help figuring out how to use Blender? If you want to learn how to use it for 3D modeling, you have come to the right place. Here, we will show you how to download it, navigate the user interface, and use sculpting tools.
What Can You Do With Blender?
Blender is an open-source program, which means it is free, and its source code is available to the public. It is just as good — if not better — than many commercial and professional-grade tools. You can easily use it for graphic design. Moreover, although it is mainly community-driven, it receives regular updates.

Do you need help figuring out how to use Blender for graphic design? It is capable of rendering, modeling, sculpting, animating, video editing, scripting, and more. Sculpting is one of the best applications for graphic design since it lets you sculpt and render complex scenes. You can make a product mock-up, visualize a project concept, or create design assets for a client.
Frequently Asked Questions About Blender
Here are the answers to some frequently asked questions about this software tool.
Is Blender Safe?
Yes, Blender is safe to download and use. As of 2023, over 23 million people have downloaded it. While the idea of free graphic design software may seem suspicious to those who have been burned by Adobe’s astronomically high subscription prices, they have nothing to worry about.
Can You Use Blender Commercially?
Any asset a person creates with Blender is their sole property, so it can be used for commercial or noncommercial purposes — even if they use third-party add-ons or Python scripts. This makes it ideal for graphic design applications.
Is Blender Free?
This tool is entirely free — no subscriptions, one-time payments, or fees — and will stay that way forever. While individuals can choose to support the team behind the software at any time, donating is entirely optional.
Will Blender Work on Your System?
Blender supports Windows, macOS, and Linux operating systems (OS) and is also available on Steam. While it works for most computers, it runs better on those with better random access memory (RAM), central processing units (CPUs), and graphics processing units (GPUs).
How to Check if Your PC Can Run Blender
This software runs “out of the box” and does not need to be installed, meaning users can place it in a folder on their desktop or download it onto a USB drive. Either way, it will open and run. Since they don’t need to be connected to the internet, they can work on projects while catching a flight or riding the subway.
While Blender runs on most machines, its creators have a few suggestions to help people get the most out of their software. For one, the minimum recommended resolution is 1920 x 1080. Even though it will technically fit on any screen size, it looks best at full HD, 2K, or 4K.
In addition to following the CPU and RAM requirements — more on that later — users should have GPUs no older than the AMD GCN 1st gen, Intel Broadwell architecture, or NVIDIA GeForce 400 series. This should be relatively easy to accomplish since those graphics cards were released in the early 2010s.
Windows users can check their machine’s hardware by going to Task Manager > Performance. There, they can see what their GPU, CPU, and RAM are. It also shows them how much storage they have left, letting them know if they have room to download the program.
Minimum and Recommended System Requirements
Graphic designers must meet Blender’s system requirements to run it. That said, they can always download an older, less resource-intensive version if their machine doesn’t meet these minimum specifications.
macOS
The minimum system requirements for Macbooks are a macOS 11.2 OS, an Apple Silicon or Intel CPU, and 8 Gigabytes of RAM. However, the program’s creators recommend that users have macOS 14, an Apple Silicon CPU, and 32 GB of RAM.
Linux
Linux users should have, at minimum, glibc version 2.28 or newer, a 4-core CPU with SSE4.2 support, 8 GB of RAM, and 2 GB of video RAM (VRAM). The recommended hardware specifications are an 8-core CPU, 32 GB of RAM, and 8 GB of VRAM.
Windows
At a minimum, Windows 8.1, a 4-core CPU with SSE4.2 support, 8 GB of RAM, and 2 GB of VRAM are necessary. For the best performance, the tool’s creators recommend Windows 10 or 11, an 8-core CPU, 32 GB of RAM, and 8 GB of VRAM.
How to Download and Run Blender
You can download Blender on Windows, Linux, or macOS via the download page on its official website. Hit the big blue button to get started. If given the option, opt for the stable release. This package contains the latest features but is no longer experimental, so you won’t have to fear crashes or unexpected performance issues.
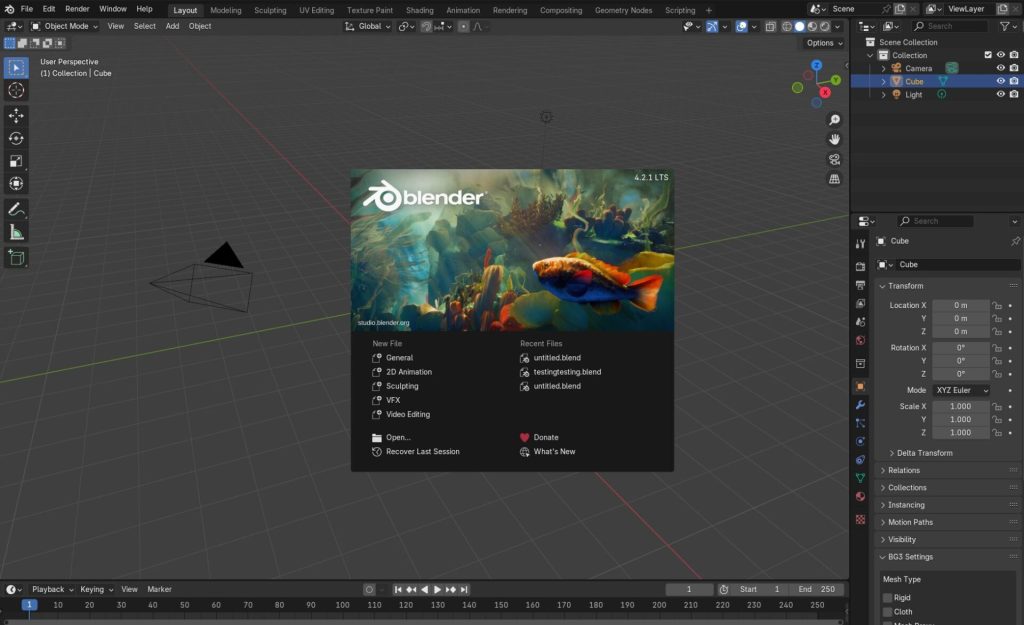
To run Blender, go where you downloaded it and double-click the file. Then, follow the instructions that pop up. On macOS, you can simply drag it into the applications folder. Just a few more steps until you can learn how to use Blender.
If you are particularly tech-savvy, Blender’s source code is free to reference or build from source. This allows you to develop new features or customize the program to your liking. That said, we recommend getting used to the platform’s basics before diving into its source code to make tweaks.
Getting Familiar With the 3D Modeling Tools
At first, learning how to use Blender may feel overwhelming. Don’t let it — you will use 20% of the tools 80% of the time. For now, we will focus on how to use Blender for 3D modeling since it is among the most effective applications for graphic design. It has photorealistic rendering, multiresolution sculpting support, advanced masking, and dynamic topology.
When you open the program, a pop-up in the center of the screen greets you. Select “sculpting” to learn how to use Blender for 3D modeling. A gray sphere should appear on your screen. This is your object. The gray void it is in is called the Viewport.
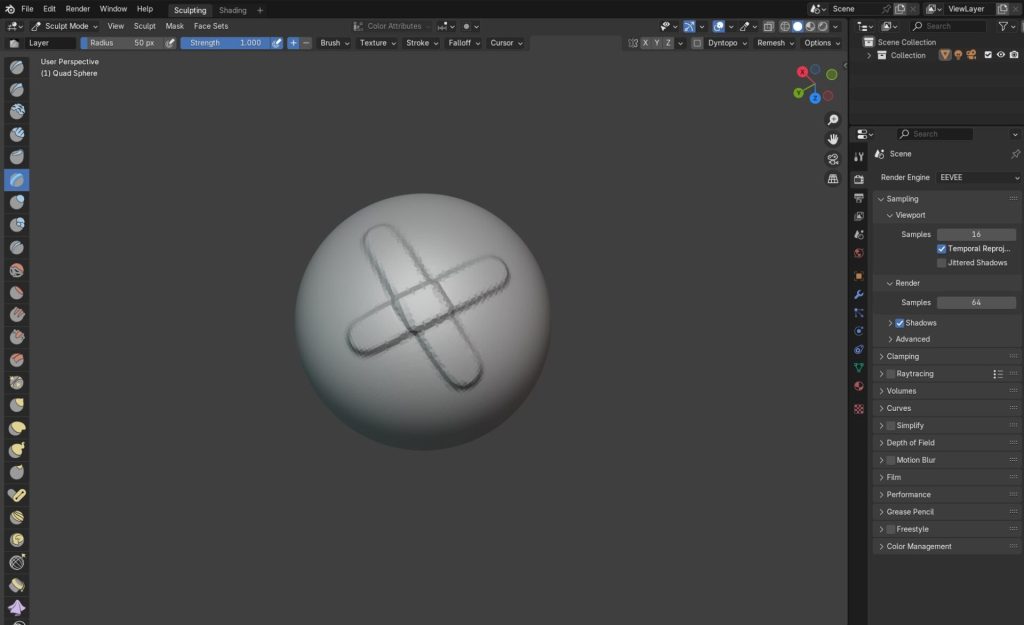
Navigating the Viewport is simple. To select the object, left-click it. To deselect it, left-click on any empty space. Press “A” to select all objects in the scene and Alt + A to deselect all. The other most-used keys are Ctrl + Z for undoing a last action — Command +Z on macOS — and Ctrl + Shift + Z for redoing it.
Do you see the small collection of colorful circles in the top right of the Viewport? Click on a node to snap to an angle or click and drag to rotate the Viewport manually. Alternatively, you can click and hold the scroll wheel down. Your view pivots around the center of the grid where your object is. If you dislike this, use the hand icon to pan. Hold “Shift + scroll wheel” to drag.
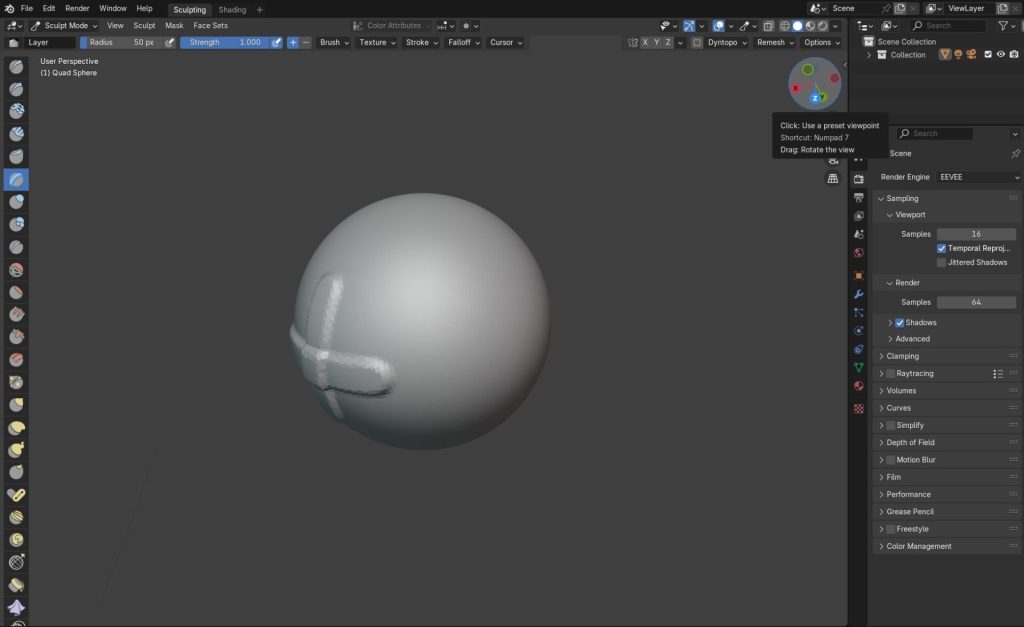
To zoom in, click the magnifying glass icon and drag it. You can also use the scroll wheel or the plus and minus keys — whichever you prefer is fine. Getting the hang of these basic navigation tools helps ensure you quickly figure out how to use Blender.
How to Use Blender for 3D Modeling
On the left-hand side, you will find all of your sculpting tools. There are 20 different brush types out of the box. You can layer, crease, smooth, flatten, deform, and more. If you need something specific, you can always create custom versions or get more from add-ons. Here, the best way to learn is to experiment.
Scene Collection is on the top right of the screen. Here, you can see all the elements in your scene — every asset, light, and camera. It gives you an easy way to select, combine, edit, or hide things.
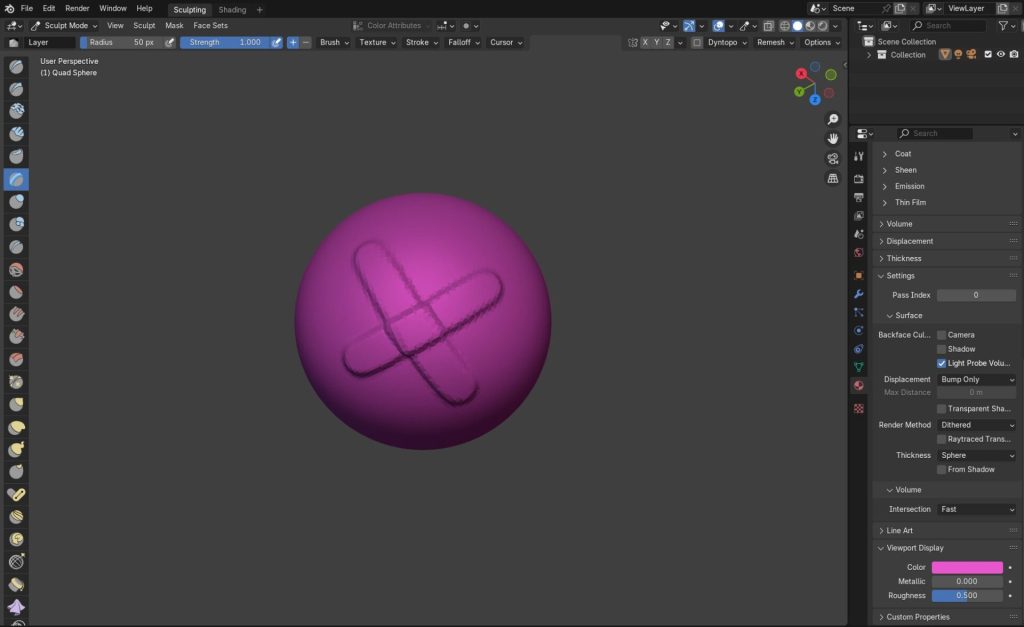
Below that is the Properties Editor. It displays the properties of whatever object you have selected in the Viewport. Ignore the bars and checkboxes for now, and click the Tools icon on the left-hand side of the editor. Here, you can change brush settings, masking, gravity, sculpting, and more. It will likely be where you spend the most time.
You’ll find World Properties by clicking on the red globe icon. Here, you can change the lighting and background color. You can adjust point, particle, and volume. Is it still gray? Use the drop-down arrow next to the Viewport shading options — the four spheres — and select the “World” background.
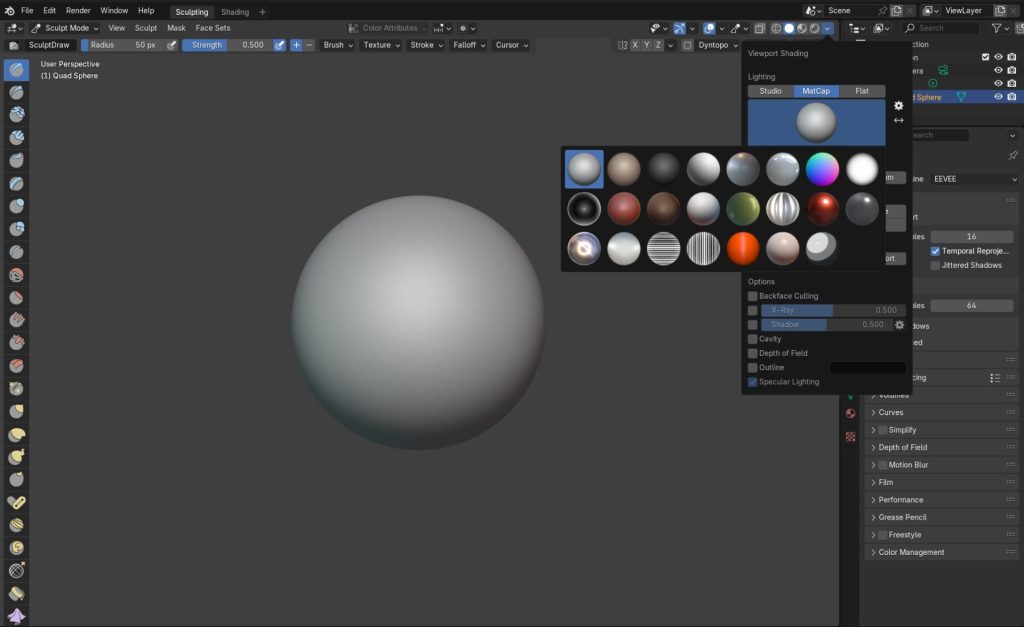
The other red circular icon is for Material Properties. Here, you can change your texture’s surface, base color, roughness, coat, sheen, film, and thickness. Use the preview window to experiment with options before committing to them. To change the object itself, scroll down to Viewport Display.
Are you tired of the gray sphere? Click the drop-down arrow for the Viewport shading options. Select MatCap and then click on the preview window to change the material you’re working with. Your choices include metal, glass, chrome, plastic, clay, and more.
Saving Your 3D Models to an Asset Library
Once you’re done, save your 3D model by going to File > Save As. You can access it by going to File > Open. If you want to categorize your creations by project or type, you can create asset libraries for them.
Go to Edit > Preferences > File Paths. Under Asset Libraries, click on the plus sign. Find the folder where you saved your 3D model and select Add Asset Library. Once you name it, go to File > New > General. Hit the clock icon at the bottom of the screen to open a pop-up menu.
In this menu, go to Asset Browser. Click the drop-down button next to Current File and select your newly created Asset Library. From here, you can drag the 3D models you have saved into your scene, streamlining complex projects.
Where to Get Free Models for Blender
Existing 3D models are excellent if you want to get the hang of how to use Blender. Fab — formerly the SketchFab store — is an online platform for downloading digital assets. You can find interiors, objects, creatures, tools, clothes, and vehicles here.
BlenderKit is another popular source of free 3D models for Blender. The unique thing about it is that you can download it as an add-on. This way, you can search and add assets without navigating away from the program. Simply type a word into the search field and find materials, objects, and more in the AssetBar. You can drag and drop them into your scene.
Go to Edit > Preferences > Add-ons and click the Install button. Find blenderkit.zip — it may have additional numbers in the name to mark the version history — in your downloads folder. BlenderKit will then appear in the add-ons list. To enable it, check the box next to its name.
Another online platform for free 3D models for Blender is CGTrader. You search and download assets from an e-commerce-like platform. There are over two million digital assets here. While many cost money, there is a “Free” tab you can browse.
Be aware that these digital assets are user-generated and may come with stipulations. While many are available for commercial and noncommercial purposes, others have restrictions. Usually, this information is highlighted upfront and easy to find. However, you should always double-check before using them in graphics design projects for clients.
Now You Know How to Use Blender
This information is enough to help you get the basics down. A comprehensive tutorial would take thousands of hours because Blender is such a versatile tool. If you still need help, you can find the best sources of support online. The most up-to-date tutorials are usually on social media under the hashtag #b3d or #blender. YouTube is one of the best sites.

Leave a Comment