Canva Tips and Tricks: Transparent Text Effect With Video

Posted on October 30, 2025 | Updated on October 30, 2025
Welcome to the Canva Tips and Tricks series, where our team will explore how to elevate your designs. When you see someone else create an ad, logo or other visual that looks like it came from a high-end ad agency, they may be using Canva.
The platform constantly adds new features for users. For many of these tricks, you will need a professional account, which starts at $12.99 per month. Save even more by paying for the year in advance. If you need the ability for teams to work on various projects, you’ll pay only $14.99 per month for up to five users. Other plans are customized to your needs.
The Effect – Transparent Typography
There are numerous fun things you can do with Canva to give a logo or animation some interest that pulls users in and keeps them engaged. Use the effect as part of a longer video on social media. It looks complicated but is fairly simple once you have the steps.
Steps to Make Transparent Text Effect With Video
You’ll find numerous videos like the one above on YouTube. Many of them skip steps. We’ve tested out the different methods and narrowed the options down to the quickest, most effective way to add a hollow text with animation behind effect. Here is our preferred method for this trick.
Step 1. Choose Your Concept
Before you start creating your animated text, think about what relates best to your company or client. With Canva, you have the option to upload your own content. If you sell orange juice, you might upload a video of pouring a glass of juice from your carton. You can then utilize your own brand imagery to create a hero video on your landing page.
Here is an example of what it might look like:

In this YouTube video, Kelly Gabel shares how to add a smoke effect to your typography for a striking look that will stand out from the competition.
https://www.youtube.com/watch?v=8wbkJ3x0LHA
You can use almost any element you can think of.
- Smoke
- Wine
- Ocean waves
- Nature
- Sports event
- Manufacturing facility
- Team meeting
The key is to determine your message and what you want to convey to your audience. It then just becomes a matter of choosing the best font to match the tone you want and tweaking the video using a few more steps.
Step 2. Set Your Size
As you likely already know if you’re a regular Canva user, you can either choose a premade template or do custom dimensions. If you’re designing a short header video for your website, you will want the dimensions to match your design’s. A good starting point is 1200 pixels by 400 to 500 pixels. Play around with the sizes until you find the perfect one for your needs.
Step 3. Add the Video
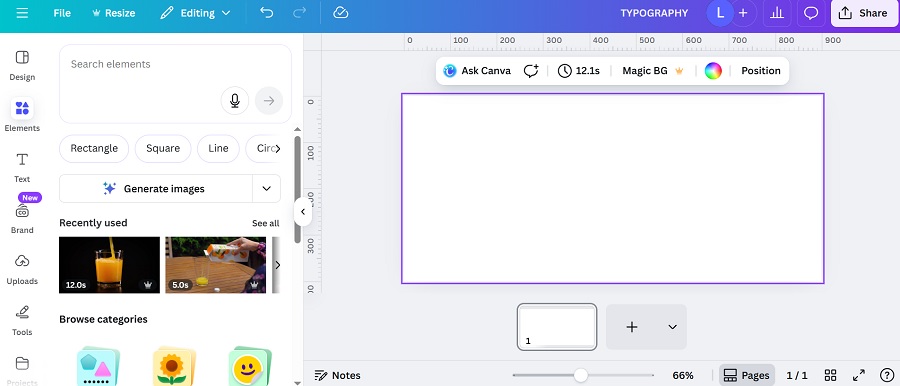
Your first step is to drop a video in the blank box. Either upload a unique video or go to your left sidebar menu and click on Elements. Add your search term in the “search elements” box. Under the box are options such as videos or photos. Click on videos as you want animation for this hack. Make sure the video fills your screen for now. You may want to adjust this slightly later on.
Step 4. Add Text

Now, you get to add text. There are many different options when it comes to fonts and typography choices. For this effect, wider and bolder text tends to work best, so the video can show through the transparent letters. You can also select one of Canva’s premade font combinations. Knowing the personality of fonts can inspire you to try something fresh!
The simplest thing is to click on heading and then adjust your selection in the font box and increase the size until it fills the area you’d like. This can vary, depending upon how you’re using the type. I also like to use all capitals for this effect.
Once you have the text placed where you want and the size and font you prefer, you need to click on the text and hit the duplicate button. Position the second word directly on top of the first. As you move it, it should snap into place for you.
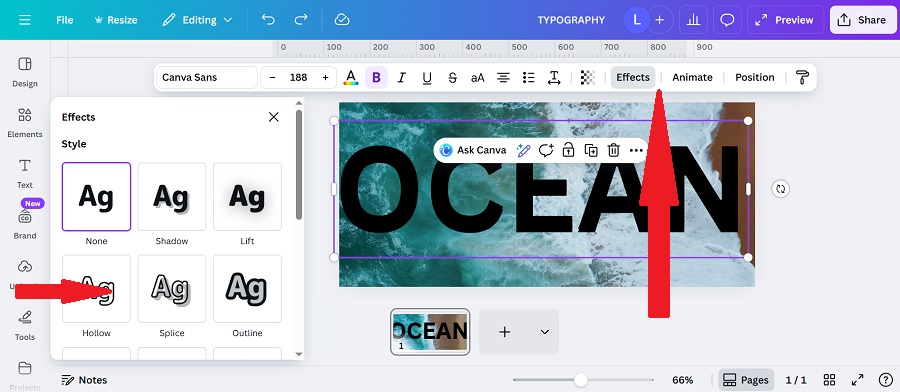
Now, with that second text still highlighted, go to Effects and choose “Hollow.” Move the thickness slider to 25 or so.
Step 5. Arrange Layers
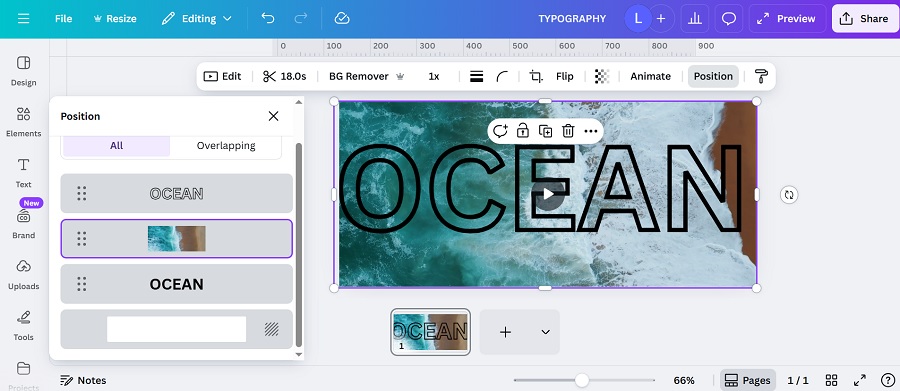
Click on any element in your design and click on “Position.” A pop up box will appear to the left of your design. If it has options like move forward/backward, click on the tab that reads “Layers.” The two words will be right on top of one another. You’ll want to grab the video layer and drag it up between the two word layers as pictured above. When you do, you should immediately see your transparent text on top of your video.
Step 6. Make Adjustments
If you viewed the “Wine” YouTube tutorial for this effect, you probably noticed the wine only poured into the middle letters and the text changed colors. Tweaking video placement can make a more subtle impact on your viewers and works well for some themes.
You may want to resize your text. Just remember to select both layers or group them together so they move together. You can also play around with adding a third layer and giving the design a three dimension look. Canva can be a lot of fun and the initial way people discovered many of these hacks was just playing around with the Pro features and seeing what they could do.
Some tutorials will tell you to remove the background on your video. This doesn’t always work, depending on the finished product you wish to create. Know that it’s an option, and with Canva Pro, only takes a single click.
Share Your Creations
We’d love to see what you come up with. Come visit us on Facebook and see what we’re up to. Reach out and share your designs. Now, go create something amazing!